Introduction
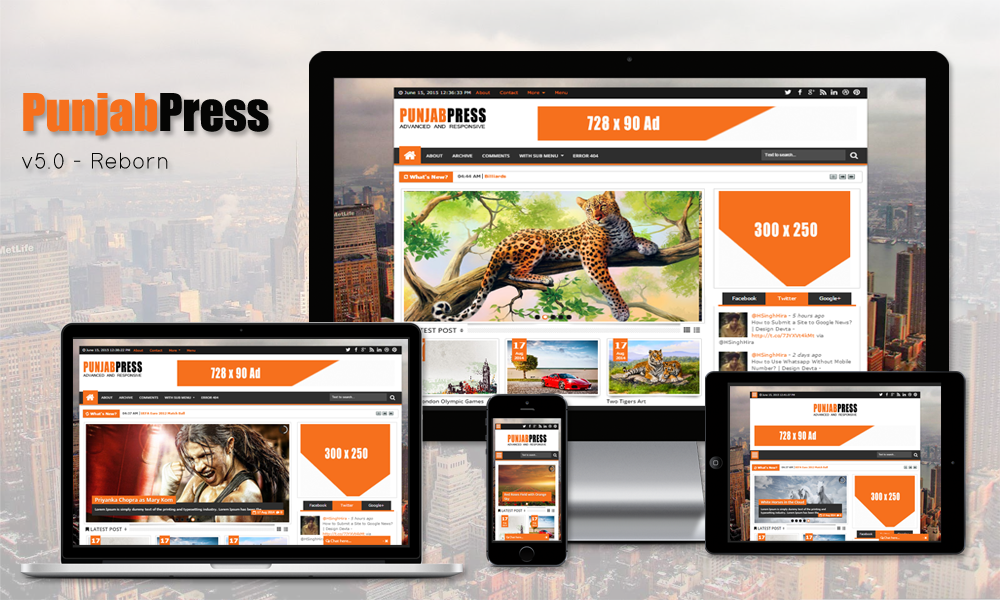
Thank you for using Punjab Press! We have spent a very long time developing this theme and the framework which it is built upon. We've done our very best to make it as expensive and feature-rich as possible, while also keeping it incredibly easy and slick to use. We've also worked hard to improve the ease of customisation, and have provided a Documentation reference for anyone who wishes to extend/modify & understand the theme and its Scripts. I'd be glad to help you if you have any questions relating to this theme. I'll do my best to assist you. If you have any more general question relating to this themes, you might consider visiting the forums and asking your question.
Overview Guide
| Current Version | v5.0 |
| Doc Version | v4.0 |
| Created on | Feb. 24, 2014 |
| Modify on | Jun. 16, 2015 |
| Copyright | Design Devta | Blogger Shapes |
| Designer | Harman Singh Hira |
| [email protected] | |
| Website | www.HSinghHira.Blospot.Com |
Improvements
We would happily welcome feedback from you on how, if anywhere, you would like this theme and documentation improved. If you would find anything a little bit easier and more helpful if we went into more detail, or explained something a little better - we'd be happy to hear it. We want Punjab Press to be the best theme on the market! If you have any comments, please mail us via the form on http://J.mP/HSinghHira_Contact.
Changelog
Here you can find the changelog for updates to Punjab Press. We will provide a full list of the changes made, be it additions, improvements, or bug fixes. If you need any more details for an update, then please log a topic in Forums.
Version 5.0
- Added Gallery Post Widget
- Added Mini Post Slider Widget
- Added Custom Twitter Widget
- Added Chat Bar System
- Added RTL Support
- Added Change Post Font Size Button
- Added Print and Email Button
- Added Search in Post Tool
- Added Blogger, Facebook and Discuss Comment System
- Added Author Bio Box
- Added Awesome Fonts Work
- Added Compatibility with New Blogger Updated Code System
- Added Contact Page
- Added Wikipedia Search Box Compatibility
- Added Background Chane with Template Deigner
- Fixed Some SEO Bugs
- Changed One Label Style
- Changed Simple Post Widgets to Animated Widgets
- Changed Simple Sharing Buttons to Addthis Share Buttons
- Improved and ChangedMain Slider
- Improved and Stylish Layout Admin Panel
- Improved and Changed Related Post Widget
- Improved Customization
- Improved Documentation
Version 4.2
- Fixed Social SEO Problem
- Improved Documentation
Version 4.0
- Added 50+ Meta tags
- Added Sitemap page
- Added Gallery Post Widget
- Added Animated Post Widget
- Added One more label Style
- Added News Ticker again
- Added Background Image
- Added Font Awesome latest Version 4.1.0
- Fixed Popular Post Summery length
- Fixed Related Post Summery length
- Fixed Post's Advertisement
- Fixed layout's Header and Top Ad Widget
- Changed Follow by Email Style
- Improved Blog Title
- Improved Blog SEO
- Improved Documentation
Version 3.0
- Removed News Ticker (due to some problems)
- Fixed Dropbox Problem
Version 2.0
- Fixed Post title problem
Version 1.0
- Added 100% Responsive
- Added Auto Featured Post (Slideshow)
- Added Manual Featured Post (Slideshow)
- Added Support Advance Editor: Upload Background Images, Change Background Color, Key Colors, Fonts
- Added Lightweight Auto read-more support third party image and youtube
- Added Ajax load more post
- Added Ajax Page Navigation
- Added Cool blogger threaded comment with Emoticon
- Added JSON Search Result
- Added Lightweight Summary
- Added Two View Mode (List and Grid) width Cookies
- Added Recent Comment Widget
- Added News Ticker Widget
- Added Related Post Widget
- Added Horizontal Post Widget
- Added Vertical Post Widget
- Added Motion Post Widget
- Added Optimize SEO
- Added Archive Page
- Added Dropdown Menu
- Added Ads ready
- Added Top Social Icon
- Added Custom Error 404 Page
- Added Easily Language Change
- Added Compatible with major browsers (IE8+,Mozilla,Chrome,Safari)
- Added Professional Admin Layout
- Added Font Awesome Icons v3.2.0
- Added Documentation
Version 0.1
Initial release version.
Installation
This Theme is made for Blogger platform only. Theme installation on blogger is very easy task. A beginner with Zero knowledge can easily install theme on Blogger.
Step By Step
Here is a brief step by step on how to install Blogger Theme:
- Unzip the “Punjab Press.zip”.
- It will contain “Punjab Press.xml” File.
- Drop it to Desktop.
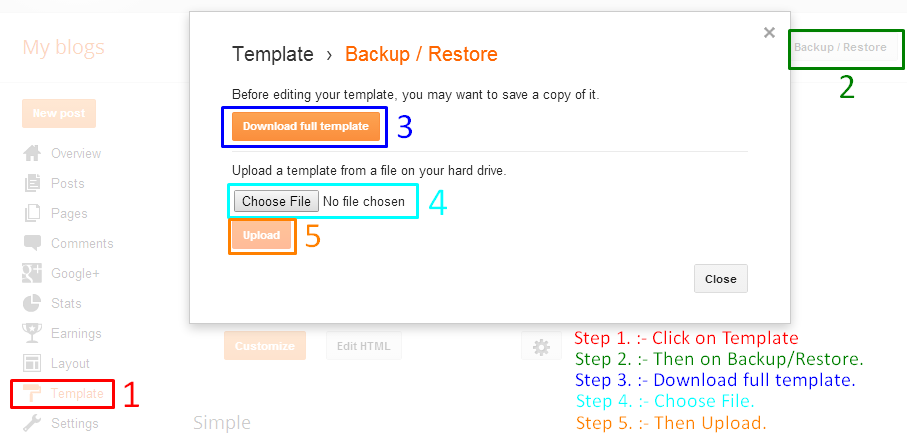
- On Blogger Dashboard Click Template.
- Then click Backup/Restore (Top Right).
- Now Choose File
- Upload “Punjab Press.xml” file from Desktop.
- Then Click Upload.
- Done.
Image Tutorial
Default Settings
After installing the theme, this it the minimum setting to make all widget works fine in this themes.
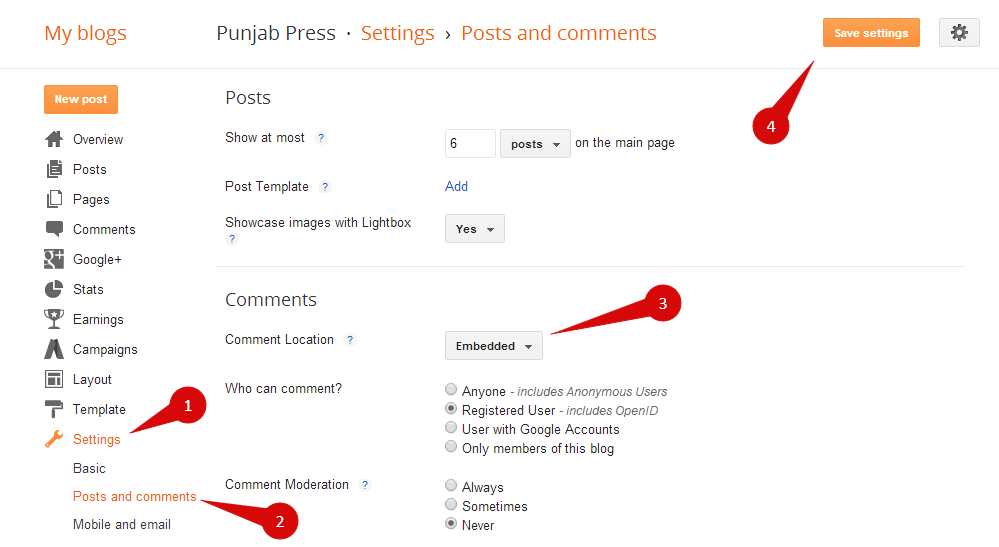
Embedded Comment
This to make comment area like the Demo and make Emotion show
- On Blogger Dashboard Click Settings
- Click Posts and Comments.
- in Comment Location Choose Embedded
- Save settings
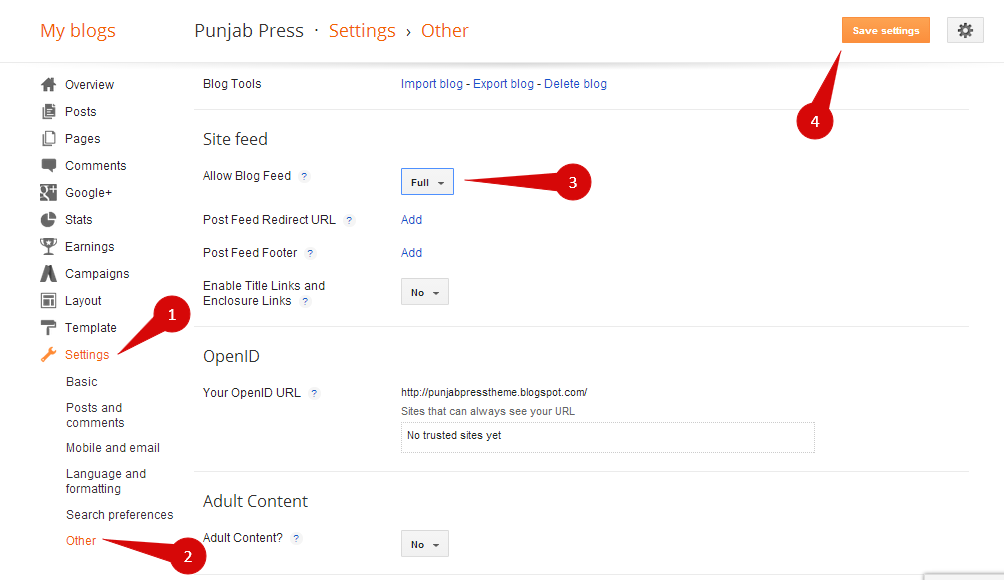
Blog Feed
This to make recent comment, Search Result, Featured Post, and Post by Label work fine
- On Blogger Dashboard Click Settings
- Click Other.
- in Site Feed Allow Blog Feed Choose Full Or Short
- Save settings
Blog Description
This is to make your Blog for better SEO.
- On Blogger Dashboard Click Settings
- Click Search preferences.
- Enable Search Description
- Write Suitable Search Description for your Blog
- Save changes

1. If yours post have image uploaded on blogspot you can choose SHORT. but if yours post just have image from third party image hosting you must choose Full.
2. Blogger feed must be not redirect to other feed site like Feedburner
3. Yours blog or website not Private
4. Write Post Description also while write new post.
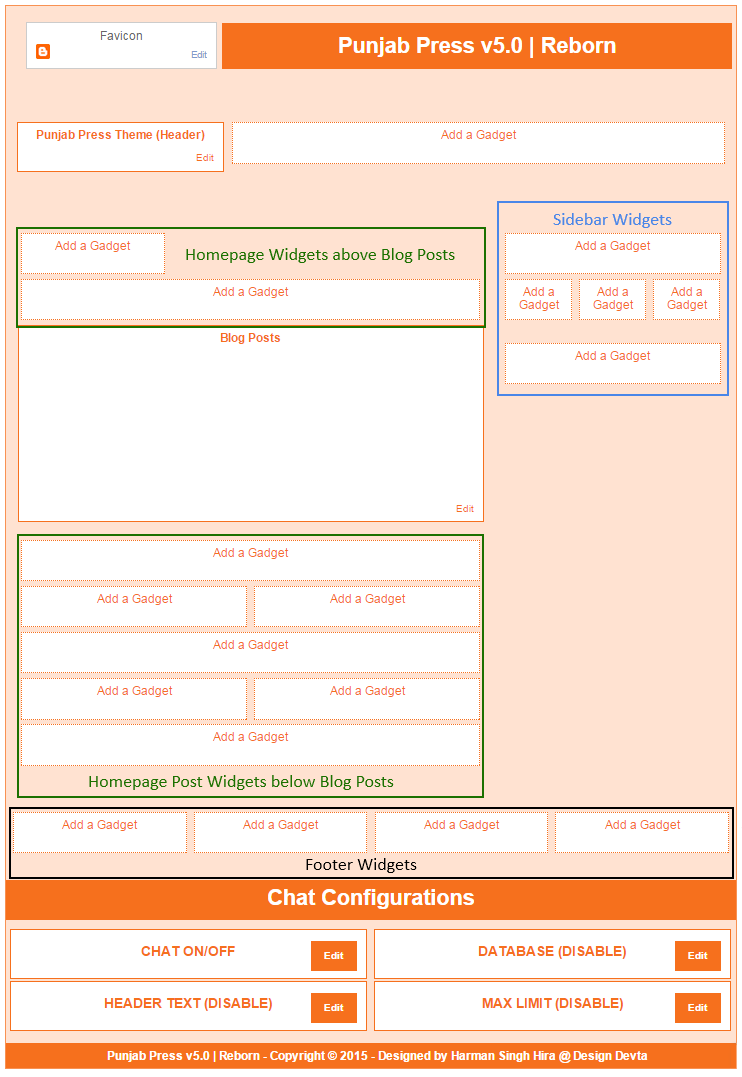
Layout Explain
Set Mobile Template
- On Blogger Dashboard Click Template
- Click on for Mobile Template
- Choose "Yes. Show mobile template on mobile devices. "
- Select "Custom" Template for Mobile
- Click Save

Chat Configurations
Chat Turn On/Off
This is to make Chat turn On or Off for your Blog.
- On Blogger Dashboard Click Layout
- Click on Chat ON/OFF Widget below Chat Configrations
- Type "chat" in widget content box without quote in small letters (Case Senstive)
- Then Click Save
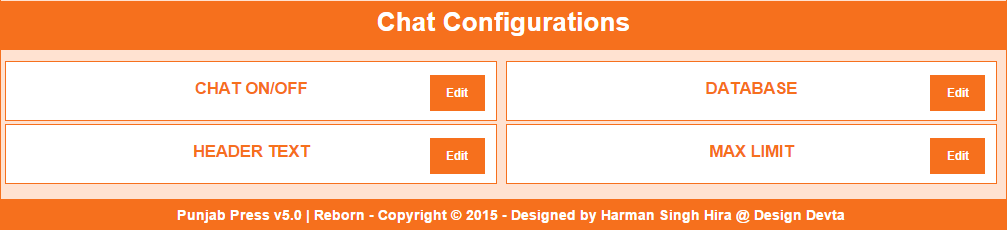
Database Setup (For Buyers Only)
This is the main setup where all chat conversation is stored for every Punjab Press user
Use Public Database
If you want to use public Database instead of creating or using your own then read below:
- On Blogger Dashboard Click Layout
- Click on DATABASE Widget below Chat Configrations
- Type "punjabpressbt" in widget content box without quote in small letters (Case Senstive)
- Then Click Save
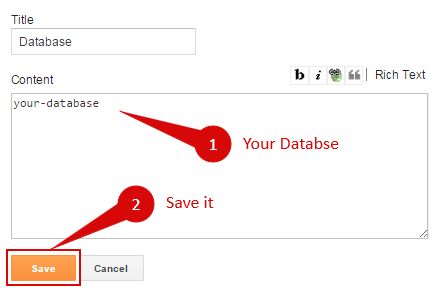
Your Own Database
If you want to create your own database then read below steps carefully:
- Go to Firebase.com and create an free account.
- Then Setup your first App.
- Enter app name and App URL Name but make sure your App URL Name is your Database
- Then click on Create New App.
- Done.
- On Blogger Dashboard Click Layout
- Click on DATABASE Widget below Chat Configrations
- Type your App URL Name as Database in widget content box without quote in small letters (Case Senstive)
- Then Click Save

Chat Header Text (For Buyers Only)
This is required for all buyers to choose their own Header Text.
- On Blogger Dashboard Click Layout
- Click on HEADER TEXT Widget below Chat Configrations
- Type your own text i.e. Chat here..., etc in widget content box without quote in small letters (Case Senstive)
- Then Click Save
Chat Max Limit (For Buyers Only)
This is required for all buyers to choose their own Chat Limit.
- On Blogger Dashboard Click Layout
- Click on HEADER TEXT Widget below Chat Configrations
- Type your own chat limit i.e. 15, 20, etc in widget content box without quote in small letters (Case Senstive)
- Then Click Save
Navigation Setup


To Edit Menu in this theme you can follow this step:
- On Blogger Dashboard Click Template
- Click Edit HTML
- Top Menu Scroll down and Find this Code :
- Change # with yours URL link
- Middle Menu Scroll down and Find this Code :
- Change # with yours URL link
<ul class='sf-menu' id='topmenunav'>
<li><a href='#'>About</a></li>
<li><a href='#'>Contact</a></li>
<li><a href='#'>More</a>
<ul>
<li><a href='#'>Menu 1</a></li>
<li><a href='#'>Menu 2</a></li>
<li><a href='#'>Menu 3</a></li>
<li><a href='#'>Menu 4</a></li>
</ul>
</li>
<li><a href='#'>Menu</a></li>
</ul> <ul class='sf-menu' id='menunav'>
<li><a class='home' expr:href='data:blog.homepageUrl'>Home</a></li>
<li><a href='#'>About</a></li>
<li><a href='#'>Archive</a></li>
<li><a href='#'>Comments</a></li>
<li><a href='#'>With Sub Menu</a>
<ul>
<li><a href='#'>Sub Menu</a></li>
<li><a href='#'>Sub Sub Menu</a>
<ul>
<li><a href='#'>Sub Menu</a></li>
<li><a href='#'>Sub Menu</a></li>
<li><a href='#'>Sub Menu</a></li>
<li><a href='#'>Sub Menu</a></li>
</ul>
</li>
<li><a href='#'>Sub Menu</a></li>
<li><a href='#'>Sub Menu</a></li>
</ul>
</li>
<li><a href='#'>Error 404</a></li></ul>
Date Settings

To Edit Date Date (Month Name) in this theme you can follow this step:
- On Blogger Dashboard Click Template
- Click Edit HTML
- Scroll down and Find this Code :
- Replace above script with below Script :
- Change Month Name in new script with yours language.
datetime();
datetime({
months:["January","February","March","April","May","June","July","August","September","October","November","December"]
});
Auto Featured Slider
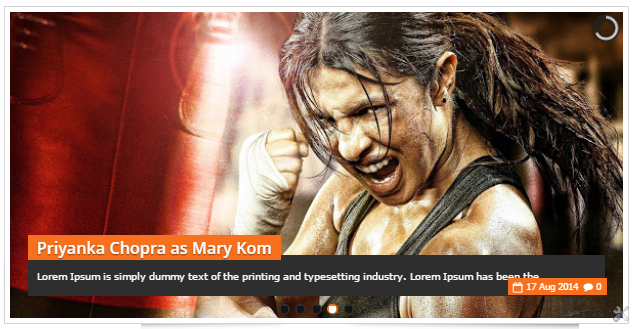
Simple Setup
To add Featured Post widget follow this step
- On Blogger Dashboard Click Layout
- Click Add a Gadget
- Choose HTML/Javascript widget
- Copy this Code:
- Then Click Save
<div id="featpost"></div>
<script type='text/javascript'>
jQuery("#featpost").AutofeaturedPost({
MaxPost:5
});
</script>
Advanced Setup
(Default) Complete Javascript to call Auto Featured Post like this code:<div id="ID_Place_To_Load_Plugin"></div>
<script type='text/javascript'>
jQuery("#ID_Place_To_Load_Plugin").AutofeaturedPost({
blogURL: "",
MaxPost: 5,
ImageSize: 600,
ShowDate: true,
ShowComment: true,
pagination: true,
thumbnails: true,
loader:"pie",
height:"50%",
Random: true,
tagName: false
});
</script>Default javascript mean if you just insert code like this:
<div id="ID_Place_To_Load_Plugin"></div>
and
jQuery("#ID_Place_To_Load_Plugin").AutofeaturedPost();Featured post result will same with default script.
if you want to change it. ex: Show featured with maximal 8 from label Movies, don't show date and comment, and post not Random (Recent). Yours script will look like this:
jQuery("#ID_Place_To_Load_Plugin").AutofeaturedPost({
MaxPost: 8,
ShowDate: false,
ShowComment: false,
RandompostActive: false,
tagName: "Movies"
});
How to use Codes?
| Property | Description |
|---|---|
| blogURL | Yours blog URL or you can leave it blank to load where this script load. |
| MaxPost | Maximum number artikel will show on Featured Post |
| ImageSize | Post Image size (in pixel) |
| ShowDate | If you want to show post date (true or false) |
| ShowComment | If you want to show Comment number (true or false) |
| pagination | If you want to show slideshow pagination |
| thumbnails | If you want to show slideshow Thumbnails |
| loader | kind of loader style : "pie", "bar", "none" |
| height | Slideshow height : "50%" mean if will resize 50% from slideshow with if you want make it fix to 300px just change with "300px" |
| Random | default true. It's will show article ramdomly. If want to show Recent Post just change to false |
| tagName | If you want to show Featured Post by the Label. Example: to show featured post from Sports Label just write like this tagName:"Sports" |
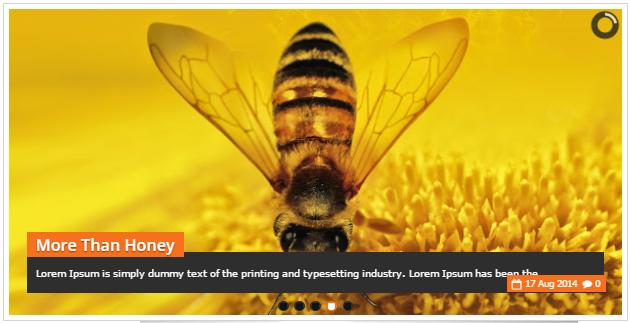
Manual Slide Show (Using Image Widget)
Simple Setup
To Create Manual Slide Show follow this step
- On Blogger Dashboard Click Layout
- On its Area Click Add a Gadeget
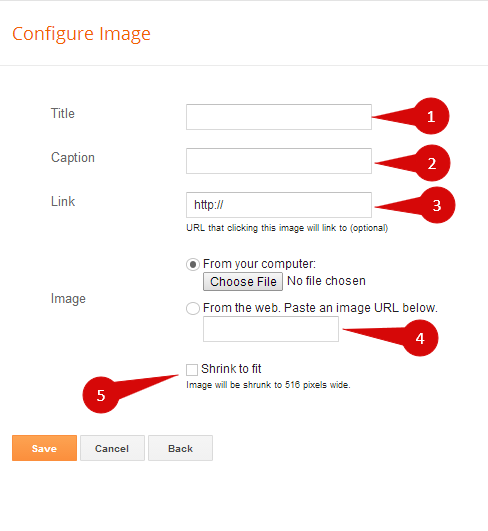
- Choose Image Widget
- Fill With Image Title
- Image Description
- Link When Image or Title Click
- Your Image Link or upload
- Uncheck shrink to fit
- Then Click Save
1. Recommended Image Size 670px x 280px.
2. If you want to Show 5 Images in Slideshow then add Image Widget 5 times with different Images and Links.
Advanced Setup
- If you want to Change Slide Show Speed or Animation Type then go to Template
- Click Edit HTML
- Scroll down and find this code:
- Replcae above Script with this Script:
- Then Click Save Template
manualfeaturedPost();
manualfeaturedPost({
height:"50%",
loader:"pie",
pagination:true,
thumbnails:true
});
How to use Codes?
| Property | Description |
|---|---|
| pagination | If you want to show slideshow pagination |
| thumbnails | If you want to show slideshow Thumbnails |
| loader | kind of loader style : "pie", "bar", "none" |
| height | Slideshow height : "50%" mean if will resize 50% from slideshow with if you want make it fix to 300px just change with "300px" |
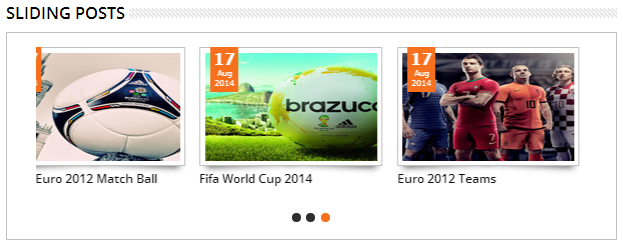
Horizontal Post Widget
Simple Setup
- On Blogger Dashboard Click Layout
- On its Area Click Add a Gadeget
- Choose HTML/Javascript Widget
- Copy Code from left Side:
- Then Click Save
To add Horizontal Post Widget follow this step
<div id="horizontalpost2"></div>
<script type='text/javascript'>
jQuery("#horizontalpost2").RecentPostbyTag({
MaxPost:7,
tagName:"Your_TagName",
postType: "h",
animated:true
});
</script>
Advanced Setup
Complete Javascript to call Horizontal Post Widget like this code:<div id="ID_Place_To_Load_Plugin"></div>
<script type='text/javascript'>
jQuery("#ID_Place_To_Load_Plugin").RecentPostbyTag({
blogURL: "",
ShowDesc: false,
ShowDate: true,
ShowComment: true,
Random: false,
AjaxLoad: true,
animation:"slide",
postType: "h",
animated: false,
sliderType: "c",
tagName: false
});
</script>
How to use Codes?
| Property | Description |
|---|---|
| blogURL | Yours blog URL or you can leave it blank to load where this script load. |
| ShowDesc | If you want to show or hide post description (work in vertical and horizontal) (true or false) |
| ShowDate | If you want to show or hide date true to show or false to hide |
| ShowComment | If you want to show or hide comment number true to show or false to hide |
| Random | If you want to generate random post true to random or false to recent. if you set true AjaxLoad will not work (same like AjaxLoad set false). |
| AjaxLoad | If you'r want More Button will load more from next page and add after last post. If you set false page will redirect if More Button clicked |
| postType | There are Three kind of PostType: "v" (vertical Post), "h" (horizontal Post) , "g1" (Gallery Post 1), "g2" (Gallery Post 2) and "s" (Slider Post) |
| animated | make it have animation effect (for Vertical and Horizontal Post) |
| sliderType | make it show carousel slide show or Slide show : "c" (Carousel Slider) or "f" (full Slideshow Slider) |
| animation | Full Slideshow effect : "slide" or "fade" |
| tagName | If you want to show Post by the Label. Example: to show post from Sports Label just write like this tagName:"Sports" |
Vertical Post Widget
Simple Setup
- On Blogger Dashboard Click Layout
- On its Area Click Add a Gadeget
- Choose HTML/Javascript Widget
- Copy this Code:
- Then Click Save
To Create Vertical Post Widget follow this step
<div id="verticalpost1"></div>
<script type='text/javascript'>
jQuery("#verticalpost1").RecentPostbyTag({
MaxPost:6,
tagName:"Your_TagName",
postType: "v"
});
</script>
Advanced Setup
Complete Javascript to call Horizontal Post Widget like this code:<div id="ID_Place_To_Load_Plugin"></div>
<script type='text/javascript'>
jQuery("#ID_Place_To_Load_Plugin").RecentPostbyTag({
blogURL: "",
ShowDesc: false,
ShowDate: true,
ShowComment: true,
Random: false,
AjaxLoad: true,
animation:"slide",
postType: "v",
animated: false,
sliderType: "c",
tagName: false
});
</script>
How to use Codes?
| Property | Description |
|---|---|
| blogURL | Yours blog URL or you can leave it blank to load where this script load. |
| ShowDesc | If you want to show or hide post description (work in vertical and horizontal) (true or false) |
| ShowDate | If you want to show or hide date true to show or false to hide |
| ShowComment | If you want to show or hide comment number true to show or false to hide |
| Random | If you want to generate random post true to random or false to recent. if you set true AjaxLoad will not work (same like AjaxLoad set false). |
| AjaxLoad | If you'r want More Button will load more from next page and add after last post. If you set false page will redirect if More Button clicked |
| postType | There are Three kind of PostType: "v" (vertical Post), "h" (horizontal Post) , "g1" (Gallery Post 1), "g2" (Gallery Post 2) and "s" (Slider Post) |
| animated | make it have animation effect (for Vertical and Horizontal Post) |
| sliderType | make it show carousel slide show or Slide show : "c" (Carousel Slider) or "f" (full Slideshow Slider) |
| animation | Full Slideshow effect : "slide" or "fade" |
| tagName | If you want to show Post by the Label. Example: to show post from Sports Label just write like this tagName:"Sports" |
Motion Post Widget
Simple Setup
To add Motion Post widget follow this step
- On Blogger Dashboard Click Layout
- On its Area Click Add a Gadeget
- Choose HTML/Javascript Widget
- Copy this Code:
- Then Click Save
<div id="carouselpost1"></div>
<script type='text/javascript'>
jQuery("#carouselpost1").RecentPostbyTag({
MaxPost:9,
ImageSize:"s180-p",
postType:"s",
tagName:"Your_TagName"
});
</script>
Advanced Setup
Complete Javascript to call Horizontal Post Widget like this code:<div id="ID_Place_To_Load_Plugin"></div>
<script type='text/javascript'>
jQuery("#ID_Place_To_Load_Plugin").RecentPostbyTag({
blogURL: "",
ShowDesc: false,
ShowDate: true,
ShowComment: true,
Random: false,
AjaxLoad: true,
animation:"slide",
postType: "s",
animated: false,
sliderType: "c",
tagName: false
});
</script>
How to use Codes?
| Property | Description |
|---|---|
| blogURL | Yours blog URL or you can leave it blank to load where this script load. |
| ShowDesc | If you want to show or hide post description (work in vertical and horizontal) (true or false) |
| ShowDate | If you want to show or hide date true to show or false to hide |
| ShowComment | If you want to show or hide comment number true to show or false to hide |
| Random | If you want to generate random post true to random or false to recent. if you set true AjaxLoad will not work (same like AjaxLoad set false). |
| AjaxLoad | If you'r want More Button will load more from next page and add after last post. If you set false page will redirect if More Button clicked |
| postType | There are Three kind of PostType: "v" (vertical Post), "h" (horizontal Post) , "g1" (Gallery Post 1), "g2" (Gallery Post 2) and "s" (Slider Post) |
| animated | make it have animation effect (for Vertical and Horizontal Post) |
| sliderType | make it show carousel slide show or Slide show : "c" (Carousel Slider) or "f" (full Slideshow Slider) |
| animation | Full Slideshow effect : "slide" or "fade" |
| tagName | If you want to show Post by the Label. Example: to show post from Sports Label just write like this tagName:"Sports" |
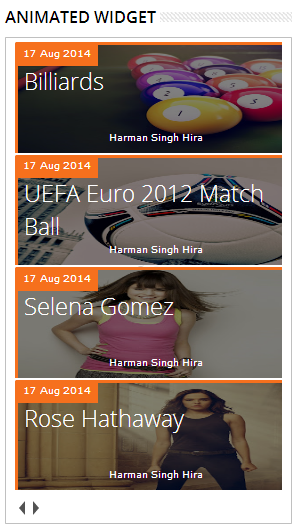
Animated Post Widget
Simple Setup
To Create Animated Post Widget follow this step
- On Blogger Dashboard Click Layout
- On its Area Click Add a Gadeget
- Choose HTML/Javascript Widget
- Copy this Code:
- Then Click Save
<div id="featuredpostside"></div>
<script type='text/javascript'>
FeaturedPostSide({
MaxPost:8,
ImageSize:300,
tagName:"Your_TagName"
});
</script>
Advanced Setup
Complete Javascript to call Vertical Post Widget like this code:<div id="featuredpostside"></div>
<script type='text/javascript'>
FeaturedPostSide({
blogURL:"",
MaxPost:8,
ImageSize:300,
interval:5000,
autoplay:true,
pBlank:"http://1.bp.blogspot.com/-htG7vy9vIAA/Tp0KrMUdoWI/AAAAAAAABAU/e7XkFtErqsU/s1600/grey.gif",
MonthNames:["Jan","Feb","Mar","Apr","May","Jun","Jul","Aug","Sep","Oct","Nov","Dec"],
tagName:false
});
</script>
How to use Codes?
| Property | Description |
|---|---|
| blogURL | Yours blog URL or you can leave it blank to load where this script load. |
| MaxPost | Maximum number of article will be show |
| ImageSize | Image Format use Picasa/Blogspot image format: To make square image (200x200) Image Format use like this "300". image will be crop to make it square. |
| Interval | Gap time for its Animation (in milliseconds) |
| Autoplay | Do you want Animation? Set it to "true" if yes or "false" if no. |
| pBlank | Backup image if post don't have image store on blogspot or picasa web |
| MonthNames | Format months name |
| tagName | If you want to show Post by the Label. Example: to show post from Sports Label just write like this tagName:"Sports" |
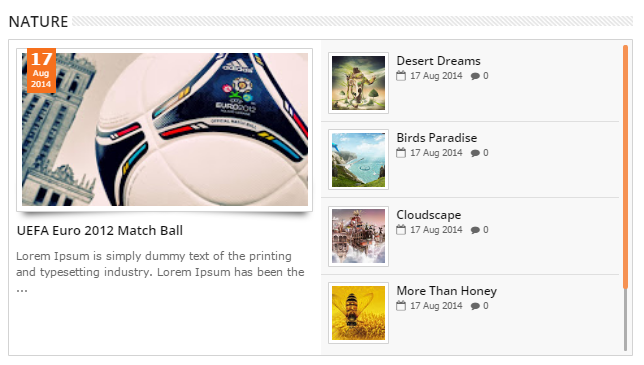
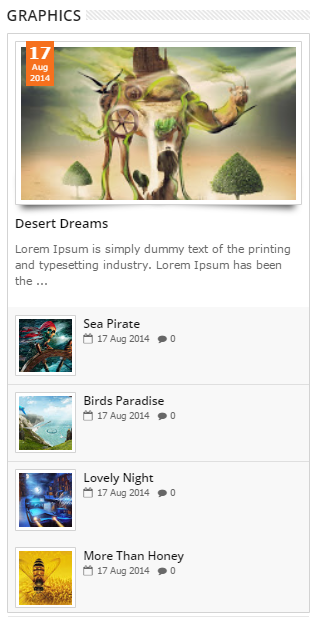
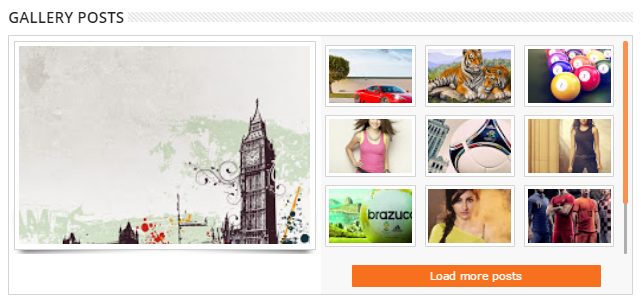
Gallery Post Widget
Simple Setup
To add Gallery Post widget follow this step
- On Blogger Dashboard Click Layout
- On its Area Click Add a Gadeget
- Choose HTML/Javascript Widget
- Copy this Code:
- Then Click Save
<div id="gallery1post1"></div>
<script type='text/javascript'>
jQuery("#gallery1post1").RecentPostbyTag({
MaxPost:13,
tagName:"Your_TagName",
postType: "g1"
});
</script>
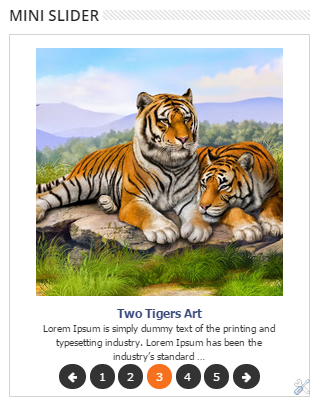
Mini Slider Post Widget
Simple Setup
To add Mini Slider Post widget follow this step
- On Blogger Dashboard Click Layout
- On its Area Click Add a Gadeget
- Choose HTML/Javascript Widget
- Copy this Code:
- Then Click Save
<div id="slider-rotator" class="loading"/>
<script>
makeSlider({});
</script></div>
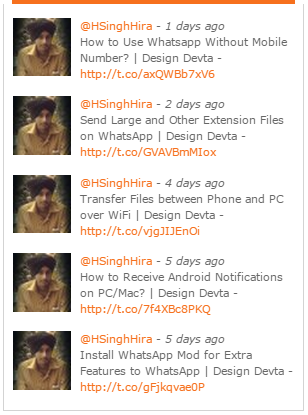
Twitter Widget
Simple Setup
- On Blogger Dashboard Click Layout
- On its Area Click Add a Gadeget
- Choose HTML/Javascript Widget
- Copy this Code:
- Then Click Save
To Create Twitter Widget follow this step
<div id="BBTwitter"></div>
<script>
$(document).ready(function() {
$('#BBTwitter').BBTwitter({
username:"Your-Username"
});
});
</script>
Advanced Setup
Complete Javascript to call Twitter Widget like this code:<div id="BBTwitter"></div>
<script>
$(document).ready(function() {
$('#BBTwitter').BBTwitter({
username:"Your-Username",
limit:5,
profile_image:true,
show_time:true,
show_media:false
});
});
</script>
How to use Codes?
| Property | Description |
|---|---|
| username | Enter your Twitter Username |
| limit | Limit of the tweets you want to display in widget |
| profile_image | true or false to show your Twitter Profile picture |
| show_time | true or false to show your Tweet timimg |
| show_media | true or false to show media for your Twitter. |
Post's Advertisement
Direct Way
- On Blogger Dashboard Click Earning
- Click Checkbox "Yes" for "Show ads on blog"
- Then Click Save Changes
This way is only Google Adsense Users.
Alternative Way
- On Blogger Dashboard Click Template
- Click Edit HTML
- Scroll down and search for :
- Add your Ad Codes just below these Codes
- Then Click Save Template
<!-- Advertisement Codes Here -->
Error Page

- On Blogger Dashboard Click Template
- Click Edit HTML
- Scroll down and Find this Code :
- Then Click Save Template
<div class='error-custom'>
<h2>404 Not Found</h2>
<p class='error-body'>We're sorry but we could not find the page you are looking for.<br/>
This may happen if you have entered site url incorrectly or this page doesn't exist anymore.</p>
<p>You can try searching page again or go back to home</p>
<form action='/search' id='searchform' method='get'>
<input id='s' name='q' onblur='if (this.value == "") {this.value = "Search...";}' onfocus='if (this.value == "Search...") {this.value = "";}' type='text' value='Search...'/>
<input id='searchsubmit' type='submit' value='Go'/>
</form>
</div>
Archive Page
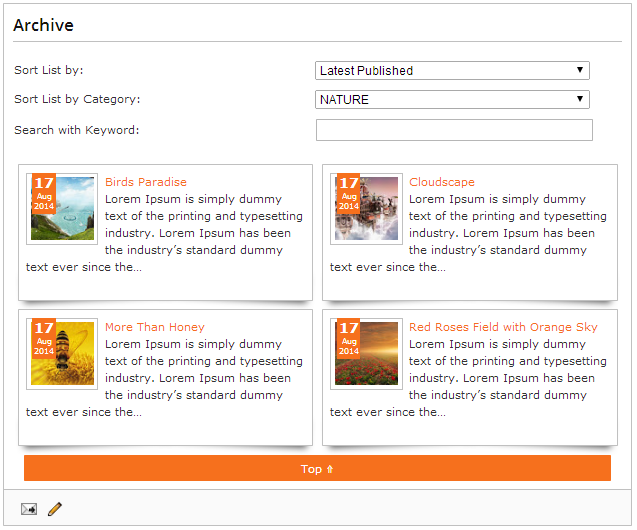
If don't know how to make New Page Follow this step.
- On Blogger Dashboard Click Page
- Click New page and choose blank page
- Give title to Page
- Click HTML and copy below codes
- Then Click Update
<div id="table-outer"><table border="0"><tr><td><label>Sort List by:</label></td><td><select id="orderFeedBy"><option value="published" selected>Latest Published</option><option value="updated">Latest Update</option></select></td></tr><tr><td><label>Sort List by Category:</label></td><td><span id="labelSorter"><select disabled><option selected>Loading...</option></select></span></td></tr><tr><td><label>Search with Keyword:</label></td><td><form id="postSearcher"><input type="text"/></form></td></tr></table></div><header id="resultDesc"></header><ul id="feedContainer"></ul><div id="feedNav">Loading...</div>
Sitemap Page

Simple Setup
If don't know how to make New Page Follow this step.
- On Blogger Dashboard Click Page
- Click New page and choose blank page
- Give title to Page
- Click HTML and copy below codes
- Then Click Update
<div id="tabbed-toc"><span class="loading">Loading...</span></div>
<script type="text/javascript">
var tabbedTOC = {};
</script>
Advanced Setup
Complete Javascript to call Auto Featured Post like this code:<div id="tabbed-toc"><span class="loading">Loading...</span></div>
<script type="text/javascript">
var tabbedTOC = {
blogUrl: "",
showDates: false,
showSummaries: false,
numChars: 200,
showThumbnails: false,
thumbSize: 40,
noThumb: "http://3.bp.blogspot.com/-vpCFysMEZys/UOEhSGjkfnI/AAAAAAAAFwY/h1wuA5kfEhg/s72-c/grey.png",
monthNames: ["January","February","March","April","May","June","July","August","September","October","November","December"],
newTabLink: true,
sortAlphabetically: true,
showNew: 7,
newText: " - <em style='color:red;'>New!</em>"
};
</script>
How to use codes?
| Property | Description |
|---|---|
| blogURL | Yours blog URL or you can leave it blank to load where this script load. |
| showDates | "true" to show the post date or "false" to hide it |
| showSummaries | "true" to show the post Summery or "false" to hide it |
| numChars | Number of summary chars |
| showThumbnails | "true" to show the posts thumbnails or "false" to hide it (Not recommended) |
| thumbSize | Thumbnail size |
| noThumb | No thumbnail Image URL |
| monthNames | Change Month Names language with your own lang. |
| newTabLink | "true" to open link in new window or "false" to open links in parent window |
| sortAlphabetically | "true" to "false" to sort posts by published date |
| showNew | "false" to hide the "New!" mark in most recent posts, or define how many recent posts to show |
| newText | HTML for the "New!" text |
Contact Form Page
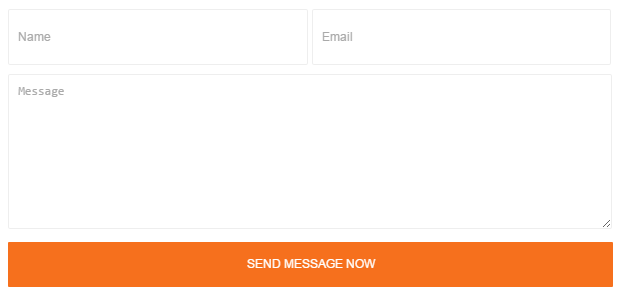
If don't know how to make New Page Follow this step.
- On Blogger Dashboard Click Page
- Click New page and choose blank page
- Give title to Page
- Click HTML and copy below codes
- Then Click Update or Publish
<div id='PP_ContactPage'><form name="contact-form"><input id='ContactForm1_contact-form-name' name='name' placeholder="Name" value='' type='text' /><input id="ContactForm1_contact-form-email" name="email" placeholder="Email" type="text" value=""/><textarea cols="25" id="ContactForm1_contact-form-email-message" name="email-message" placeholder="Message" rows="5"></textarea><input class="btn medium green" id="ContactForm1_contact-form-submit" type="button" value="Send Message Now" style="width:100%;height:50px"/><div style="text-align: center; max-width: 100%;"><p class="contact-form-error-message" id="ContactForm1_contact-form-error-message"></p><p class="contact-form-success-message" id="ContactForm1_contact-form-success-message"></p></div></form></div>
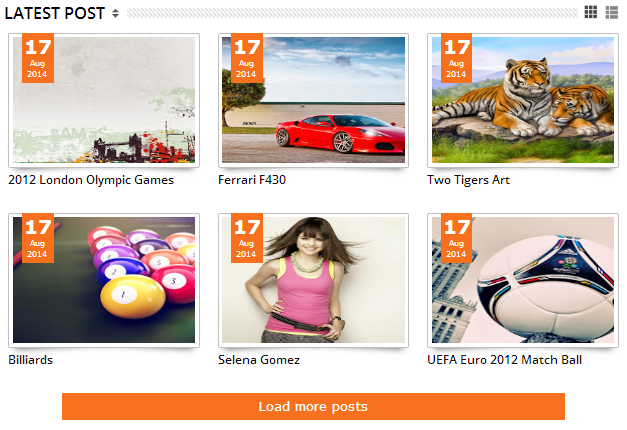
Post Summery, Load more & Page Navi, etc Customization
Summary and Load more image use Official Blogspot Thumbnail. It mean the image must upload to blogspot for make it show on home page.
- On Blogger Dashboard Click Template
- Then click Edit HTML
- Scroll down and Find this Code :
- Change them according to you
- Atlast Click Save Template
var configSummary = {
thumbnailSize: "s180-c",
summaryLength: 200,
slideffect: true,
maxImage:5,
slideSpeed: 3000,
defaultNavigation:"LoadMore",
defaultView:"grid",
postPerPage:6,
numshowpage:3
};

How to use codes?
| Property | Description |
|---|---|
| thumbnailSize | Image Format use Picasa/Blogspot image format: To make square image (180x180) Image Format use like this "s180-c" or "s180-p". image will be crop to make it square. Blogspot Image format also look like this : "s180" (if image landscape width will 180px. If image Portrait height will 180px), "w180" (image width will 180px) or "h180" (image height will 180px) |
| summaryLength | Define the summary length |
| slideffect | If your post have image more than you set this true image will become slideshow. note: this setting must be same with Load More Post or Page Navigation |
| maxImage | Maximum image add to the sildeshow |
| slideSpeed | Set the speed of the slideshow cycling, in milliseconds |
| defaultNavigation | default home page navigation: "LoadMore" or "PageNavi" |
| defaultView | This will setup view mode: you can choose "grid" to show your's post on grid mode or "list" to show your's post on list mode |
| postPerPage | Number Post Will show if next Page Number Click. Note must be same with "Show at most" on Blogger Setting |
| numshowpage | Number Page Number will Show |
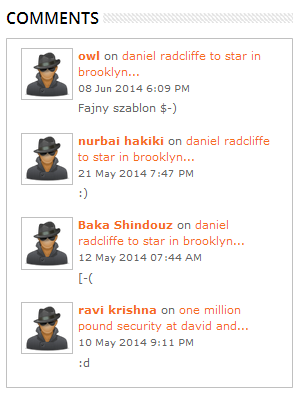
Recent Comment Customization
To add recent comments widget follow this step- On Blogger Dashboard Click Layout
- Click Add a Gadget
- Choose HTML/Javascript
- Copy this codes and paste in widget contents
- Click Save
<div id="rcentcomnets"></div>
<script type='text/javascript'>
RecentComments();
</script>
Advanced Setup
Complete Javascript to call Recent Comments like this code:<div id="rcentcomnets"></div>
<script type='text/javascript'>
RecentComments({
blogURL:"",
numComments:4,
characters:100,
id_containrc:"#rcentcomnets",
avatarSize:50,
Showimage:true,
defaultAvatar:"http://4.bp.blogspot.com/-AEWksK942OE/UFiyLzXJhiI/AAAAAAAAFKE/jBegaGPClxI/s70/user-anonymous-icon.png",
maxfeeds:50,
adminBlog:""
});
</script>
How to use Codes?
| Property | Description |
|---|---|
| blogURL | Yours blog URL or you can leave it blank to load where this script load. |
| numComments | maximum number of recent comment |
| characters | Number of summary characters to show. if set 0, will not show summary |
| id_containrc | ID of div where the recent comment will be display must add this #, Example: if want to show in <div id="rcentcomnets"></div> write like this "#rcentcomnets" |
| avatarSize | Image thumbnail size/avatar size |
| Showimage | Show or hide the avatar. Value : true or false |
| defaultAvatar | Backup image if comment author don't have avatar image |
| maxfeeds | Maximum feed to load |
| adminBlog | Control to show or hide author/admin comment. ex: if you don't want to show your comment, simply just write yours blogger name like this adminBlog:"Harman Singh Hira" |
JSON Search Result Customization
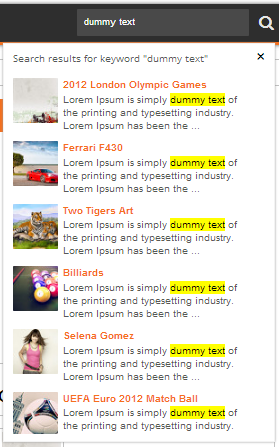
-
To edit JSON Search Result Text you can follow this step
- On Blogger Dashboard Click Template
- Choose Edit HTML
- Scroll down and Find this Code :
- Click Save Template
searchxx({summaryLength:100, scrthumbSize:50});
Advanced Setup
Complete Javascript to call JSON Search Result like this code:searchxx({
blogURL:"",
srcBlank:"http://1.bp.blogspot.com/-htG7vy9vIAA/Tp0KrMUdoWI/AAAAAAAABAU/e7XkFtErqsU/s1600/grey.gif",
findText:"Search results for keyword",
NotfindText:"No result!",
Showthumb:true,
LoadingText:"Searching...",
summaryLength:100,
scrthumbSize:50
});
How to use Codes?
| Property | Description |
|---|---|
| blogURL | Yours blog URL or you can leave it blank to load where this script load. |
| srcBlank | Backup image if post don't have image |
| findText | Sentence if founded post by the keyword |
| NotfindText | Text if no post founded |
| Showthumb | Show or hide the post thumbnail. Value : true or false |
| LoadingText | Text to show went searching |
| summaryLength | Length of summary characters |
| scrthumbSize | Size of thumbnail image, size in pixel |
Emoticon Customization

To edit Emoticon Text you can follow this step
- On Blogger Dashbord Click Template
- Click Edit HTML
- Scroll down and Find this Code :
- If you want to change it. You can see complete default Script below:
emoticonx({
emoRange:"#comments p, div.emoWrap",
putEmoAbove:"iframe#comment-editor",
topText:"Click to see the code!",
emoMessage:"To insert emoticon you must added at least one space before the code."
});
This Code you will found twice
| Property | Description |
|---|---|
| emoRange | Where the emoticon will show/work |
| putEmoAbove | Where the emoticon sample will place |
| topText | Sentence below the emoticon sample |
| emoMessage | Sentence below the emoticon sample and alert box |
News Ticker Customization

To edit News Ticker Text you can follow this step
- On Blogger Dashbord Click Template
- Click Edit HTML
- Scroll down and Find this Code :
- Complete Javascript to call JSON Search Result like this code:
- If you want to change it. You can see complete default Script below:
NewsTicker();
NewsTicker({
blogURL: "",
MaxPost: 10,
Speed: 0.10,
titleText: "Latest",
tagName: false,
MonthNames: ["Jan", "Feb", "Mar", "Apr", "May", "Jun", "Jul", "Aug", "Sep", "Oct", "Nov", "Dec"]
});
| Property | Description |
|---|---|
| blogURL | Yours blog URL or you can leave it blank to load where this script load |
| MaxPost | Maximum number artikel will show on News Ticker |
| Speed | Speed each artikel effect |
| titleText | News Ticker Title Text |
| tagName | If you want to show News Ticker by the Label. Example: to show post from Sports Label just write like this tagName:"Sports" |
| MonthNames | Format months name |
Related Posts Customization
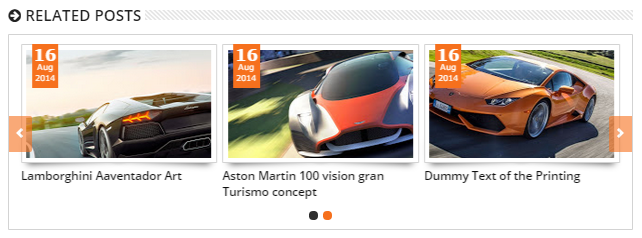
- On Dashboard Click Template
- Choose Edit HTML
- Scroll down and Find this Code :
relatedPostsWidget();
Advanced Setup
Complete Javascript to call Related Post like this code:relatedPostsWidget({
blogURL:"",
maxPosts:5,
maxTags:5,
maxPostsPerTag:5,
ShowComment:true,
ShowDate:true,
DateFloat:false,
ShowDesc:true,
readMoretext:"Read more »",
rlt_thumb:70
});
How to use Codes?
| Property | Description |
|---|---|
| blogURL | Yours blog URL or you can leave it blank to load where this script load. |
| maxPosts | Maximum number of article will be show (if Related Post) |
| maxTags | Maximum Tag/Label will load |
| maxPostsPerTag | Maximum post each tag/label will be show (maximum recent post if article don't have tag/label) |
| ShowComment | Show or Hide Comment Number. option true or false |
| ShowDate | Show or hide Date. option true or false |
| DateFloat | If you want make the date like Recent Post by Tag Date model. |
| ShowDesc | Show or hide post description. option true or false |
| rlt_thumb | Size of thumbnail image, size in pixel |
| readMoretext | Read More Text |
Author Box
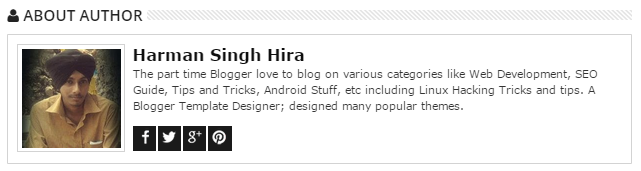
- On Dashboard Click Template
- Choose Edit HTML
- Scroll down and Find this Code :
- Replace Social Link and Info according to you.
- Click Save Template
top-authorinfo
Theme Customizer
- Just Go to Blogger Dashbord and Click Template
- Then Click Customize
Blogger Customize will work if Blogger Mobile Template Enabled before upload this Theme. After customize yours template you can disable Blogger Mobile Template but it will make Blogger Customize not work
Background Customizer
Just select or upload imagge to set as background image or you can also choose any color for background.
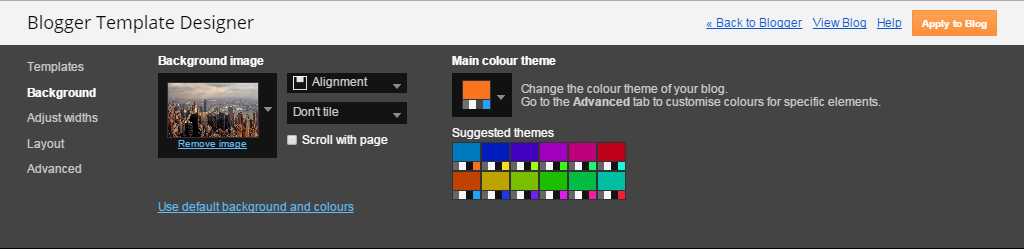
Advanced Customizer

| Property | Description |
|---|---|
| Header Title | This for setting the Header Font, Description Font, Header Color and Description Color |
| Top Navigation | Top Navigation Text Color, Navigation Background Color, and Selected/current link Color |
| Middle Navigation 1 | Background color, Shadow color and Selected/current link color |
| Middle Navigation 2 | Font type, Sub Menu background color, Link Color |
| Middle Navigation 3 | Responsive Button Color, Responsive Shadow color, Responsive Background Color |
| Content Area | Font type, Background color, Text Color, Box Shadow Color |
| News Ticker | Border Color, Latest Background Color, Latest Text Color |
| Sidebar | Sidebar Border Color, Sidebar Background Color, and Sidebar Text Color |
| Sidebar Tab | Tab Background Color, Tab Selected color, Tab Text color |
| Main Area 1 | Heading font type, Post font type, Heading font color, Post text color |
| Main Area 2 | Button/Date Background color, Button/Date Hover Color, Button/date Text Color |
| Back top Button | Back top Background color and Hover Color |
| Footer Area 1 | Footer heading font type, Heading color, Footer Text color |
| Footer Area 2 | Footer Background color and Border top Color |
| Search Box | Search Box background Color, Text Color, Box Result Background Color, Box Result Text Color |
| Comment Area | Border Color, Reply Box Background Color, Reply Box Shadow Color |
| Post Footer | Border top Color, Background color |
| Slideshow | Slideshow title font type, Text Color, Title Background color, Description Background color |
| Body Background Color | Main body background color |
| Link Color | Main link color |
| Visited Link color | main visited link color |
| Image Border Color | Border of image color |
| Heading Font | Heading Font type |
| Post Title Color | Post Title color or artikel |
Global Configurations
- On Dashboard Click Template
- Choose Edit HTML
- Scroll down and Find this Code :
- Change the settings according to you by reading below.
- Click Save Template
var Alldefaultconfig = {
MaxPost:5,
MoreText: "Load more posts",
monthName: ["Jan", "Feb", "Mar", "Apr", "May", "Jun", "Jul", "Aug", "Sep", "Oct", "Nov", "Dec"],
timemonthName: ["January", "February", "March", "April", "May", "June", "July", "August", "September", "October", "November", "December"],
timeFormat:"12",
viewMoreText: "View More About",
BackupImage: "http://1.bp.blogspot.com/-htG7vy9vIAA/Tp0KrMUdoWI/AAAAAAAABAU/e7XkFtErqsU/s72-c/grey.gif",
summaryLength:100,
FirstImageSize:"s220-p",
ImageSize:"s70-p",
slideshowSpeed:5000,
RandomTitle:"Random Posts",
RecentTitle:"Recent Posts",
RelatedTitle:"Related Posts",
RelatedStyle:"carousel",
CommentMode:"blogger",
redirectMobile:false,
transitionStyle:"backSlide"
};
| Property | Description |
|---|---|
| MaxPost | Default Maximum Post (Recent Post by Tag,RelatedPost,AutoFeaturePost) |
| MoreText | Define Load More Text if Recent Post |
| monthName | Month Name format (Recent Post by Tag, Recent Comment, AutoFeatured Post, Related Post, News Ticker) |
| timemonthName | Month Name Format for Top navigation Date Time Widget |
| timeFormat | Time Format for Top navigation Date Time Widget |
| viewMoreText | Define More Text (Recent Post by Tag and JSON Search) |
| BackupImage | Backup image if post don't have image |
| summaryLength | Default Summary Length (Recent Post by Tag, Related Post, JSON Search,AutoFeaturePost) |
| FirstImageSize | Default First Image Size in Recent Post by Tag (blogger/blogspot format).Image Format use Picasa/Blogspot image format: To make square image (200x200) Image Format use like this "s200-c" or "s200-p". image will be crop to make it square. Blogspot Image format also look like this : "s200" (if image landscape width will 200px. If image Portrait height will 200px), "w200" (image width will 200px) or "h200" (image height will 200px) |
| ImageSize | Default Image Size in Recent Post by Tag (blogger/blogspot format). Image Format use Picasa/Blogspot image format: To make square image (200x200) Image Format use like this "s200-c" or "s200-p". image will be crop to make it square. Blogspot Image format also look like this : "s200" (if image landscape width will 200px. If image Portrait height will 200px), "w200" (image width will 200px) or "h200" (image height will 200px) |
| slideshowSpeed | Default Slideshow Speed in milisecond (Featured Post, Slider Post on RecentPost by Tag ) |
| RandomTitle | Define Random Post Title (if Random Post widget don't have title) |
| RecentTitle | Define Recent Post Title |
| RelatedStyle | Related post style: there are two related post style "carousel" or "normal" style |
| RelatedTitle | Define Related Post Title |
| CommentMode | Default Comment mode: "blogger" or "facebook" or "disqus" |
| redirectMobile | enable or disable redirect Blogger Mobile version. true to enable, false to disable |
| transitionStyle | slider effect: "fade","backSlide","goDown",or "fadeUp". this option just for lightweight version. |
RTL Support
- On Blogger Dashboard Click Template
- Then click Edit HTML
- Scroll down and Find this Code :
- Replace with below codes
- Atlast Click Save Template
<Variable name="startSide" description="Side where text starts in blog language" type="automatic" default="left" value="left"/>
<Variable name="endSide" description="Side where text ends in blog language" type="automatic" default="right" value="right"/>
<Variable name="startSide" description="Side where text starts in blog language" type="automatic" default="right" value="right"/>
<Variable name="endSide" description="Side where text ends in blog language" type="automatic" default="left" value="left"/>
Facebook Comment Setup
Settingup Blogger Layout
- On Blogger Dashboard Click Layout
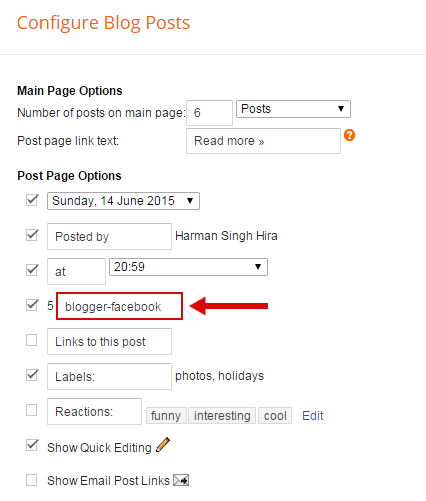
- Then click Edit for Blog Post Widget
- In the Configure Blog Posts window, you will pick comment systems by input their names in comment text field. Template supported 3 names: blogger, facebook, disqus. You can combine two of them by separate their names by "-". Example, combine blogger with facebook comment system like the demo blog, you can input blogger-facebook.
- Atlast Click Save Template

How to Get Facebook Profile ID?
- Click here to get Profile ID
How to Get Facebook App ID?
- Go to http://developers.facebook.com and login with your Facebook account.
- If you don't already have a Facebook Developer account, click on the "Apps" button in the top title bar of the web page. Follow the steps in the wizard to register as a Facebook developer.
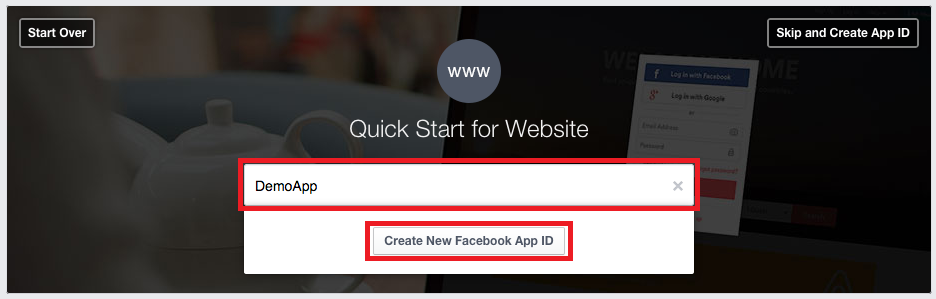
- Once you're registered as a Facebook developer, click on the "Apps" button in the top title bar of the web page. Click on the "Create New App" button in the drop down menu to create a new Facebook app.
- Choose the "Website" option on the right side of this window.
- Choose a name for your app and click on the "Create New Facebook App ID" button.
- Choose a category for your app and click the "Create App ID" button.
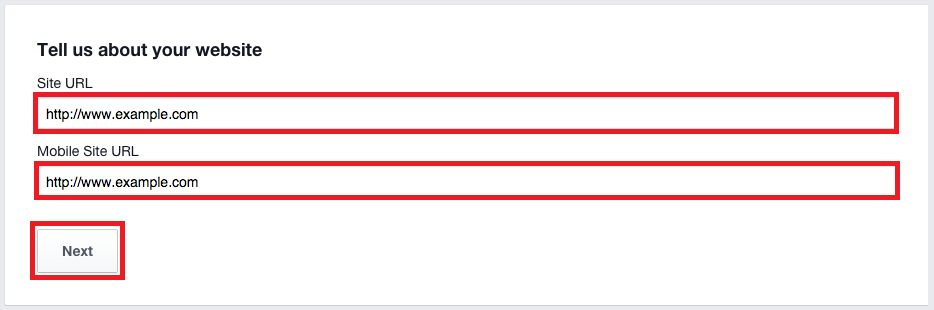
- Scroll to the bottom of the next page and fill in a valid Site URL and Mobile Site URL. If you don't have a website or mobile site URL, just use http://www.example.com. Once you have entered your information here, click "Next".
- Scroll down the page and click the hyperlink "Skip to Developer Dashboard"
- Once the Facebook app has successfully been created, you still need to set the app live before the necessary key (App ID and App Secret)
- Go to the "Settings" page of your Facebook app and make sure that the Contact Email field is filled in. The app can't be set live without a Contact Email
- Once you've entered your Contact Email, you can set the app live in the "Status & Review" page of the app.
- Go back to the "Dashboard" of the app. Here you will find the App ID
- Done

Settingup Template Work
- On Blogger Dashboard Click Template
- Then click Edit HTML
- Scroll down and Find this Code :
- And also
- Replace FB_APP_ID with your Facebook App ID and FB_ID with your Profile Numbric ID.
- Atlast Click Save Template
<meta content='FB_APP_ID' property='fb:app_id'/>
<meta content='FB_ID' property='fb:admins'/>
<div id='facebook-comment-appid' style='display:none'>FB_APP_ID</div>
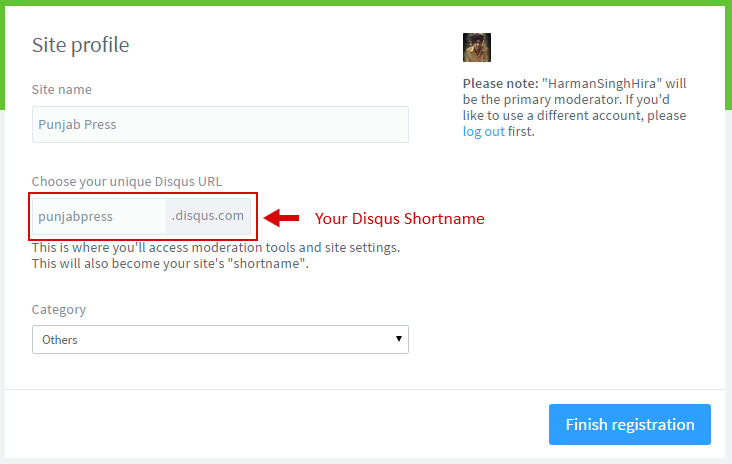
Disqus Comment Setup
Settingup Disqus Work
- Create a free account on Disqus or login
- Then click here to add site
- Now Enter Site Name and Disqus URL. (Your Disqus URL is Disqus Short Name)
- Then Hit Finish registration Button
- Done
Settingup Template Work
- On Blogger Dashboard Click Template
- Then click Edit HTML
- Scroll down and Find this Code :
- Replace DISQUS_SHORT_NAME with your Disqus Short Name.
- Atlast Click Save Template
<div id='disqus-shortname' style='display:none'>DISQUS_SHORT_NAME</div>
Download
Fremium
$0
Non-Removal Credits
Public Database
Default Heder Text
Default Chat Limit
Encyrpted Scripts
Download
Premium
$29.9
Removal Credits
Your own Database
Custom Header Text
Custom Chat Limit
Encyrpted Scripts
Purchase
Ultra Pro
$55.5
Removal Credits
Your own Database
Custom Header Text
Custom Chat Limit
Decyrpted Scripts
Purchase
Discuss Issues and Future
Credits
- Superfish v1.7.2 by Joel Birch
- jQuery News Ticker by Rhodimus
- jQuery FlexSlider v2.2 by Tyler Smith
- Mousewheel v3.0.6 - jQuery Scroll Mouse Wheel by Brandon Aaron
- HoverIntent r7 by Brian Chern brian(at)cherne(dot)net
- Antiscroll by Guillermo Rauch [email protected]
- Many Scripts from Helplogger
Top Social Icon
To Edit Social Icon in this theme you can follow this step:
<ul class='sociico' id='icon-socialmn'>
<li class='sotw'><a href='#' target='_blank'>twitter</a></li>
<li class='sofb'><a href='#' target='_blank'>facebook</a></li>
<li class='sogo'><a href='#' target='_blank'>google</a></li>
<li class='sorss'><a href='#' target='_blank'>rss</a></li>
<li class='solinkn'><a href='#' target='_blank'>linkedin</a></li>
<li class='sodrib'><a href='#' target='_blank'>dribbble</a></li>
<li class='sopint'><a href='#' target='_blank'>pinterest</a></li>
</ul>